If you think there is something missing or unclear from this guide, don't hesitate to comment. Or edit the guide directly, this is a wiki after all :)
New Player Basics
Tips intended for Pirate Level (P-LV) <70 - but even more experienced players may find few useful nuggets here.
Before you start
At the beginning, near the end of tutorial, you get a random Rare Recruit (RR) unit. Eventually you will have dozens if not hundreds of those, but your starting one can significantly affect your game. The problem is that as a n00b, you do not know if you got something useful or a piece of crap. With hundreds of units, this needs a dedicated guide. Here is a brief summary:
For Perfectionists: It is recommended you start the game during a biweekly Sugo Fest event. Then wait until you get the Sugo-Rare unit. The odds of that are about 1-2%. Good luck, and we hope you won't hate the game after an expected 50+ runs through the tutorial...As compensation, consider that each pull is equivalent to 5 Rainbow Gems, which you need to collect over a 5 day period or buy for 5 USD.
For Less Patient People: you want a unit that is non-farmable (does not drop from story missions), and has a good captain ability. Good captain abilities mention the word PERFECT, or ATK boosts that are over 2x in their captain ability. Of course, there are exceptions, and many units out there have great specials. If in doubt, google "optc is NAME a good unit" and you should get an idea.
Also see the guide at https://www.reddit.com/r/OnePieceTC/wiki/guides/reroll
Beginner Guide to Team Building
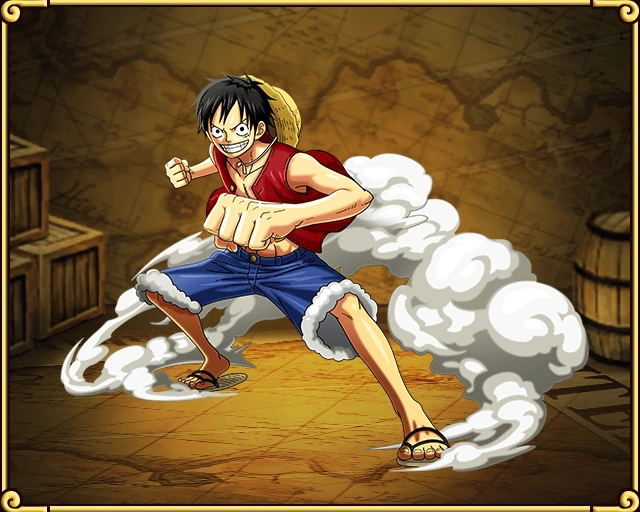
This is your starting captain. He will work for a short while, but even when fully evolved he will become too weak to help you clear most of mid-to-late game content.
You start the game with stage two Luffy, namely Monkey D. Luffy Gum-Gum Pistol, a random Rare Recruit unit and some common trash units. If you read about re-rolling above, your initial RR unit should be good. You will also get 5 rainbow gems for "500 taps" during initial download, and you will be getting 1 free rainbow gem each day in the in game mail (you will also get more gems from various events and achievements). Convert them to RR units ONLY during Sugo-Fest Event.
You may be limited from being able to put your RR unit(s) in your team due to being "overcost". Keep playing and this limit will go away (at the speed of roughly 2 cost per every 2 pirate levels (P-LV), with every other level giving you one more unit of stamina).
Anyway, you will probably have no choice but to use your starting Luffy as a captain of your trash characters for few battles (unless you started during rare times everyone gets a promo character, which are often newebie friendly). Don't worry, the first battles are simple enough that your starting units will work with no sweat. However, as you continue with the game, the difficulty will increase. You will need to think about which characters to use, and who to chose as your captain.
You can have eight precontructed teams. Early on, you should try to build one team of each color, one anti-turtle team for speed turtle farming, and for the other two teams try to build them around classes. The classes you choose will depend on your characters, common ones based on farmable units include Slashers and Fighters (led by farmable early story mode characters such as Enraged Arlong Shark On Tooth and Chef Zeff. As you figure out who the boss for each stage is (or check the guide like East Blue), and keeping color strengths and weaknesses in mind, you'll see that some teams work better for some stages then others (ex. against a STR boss you'll want to have a QCK team if possible).
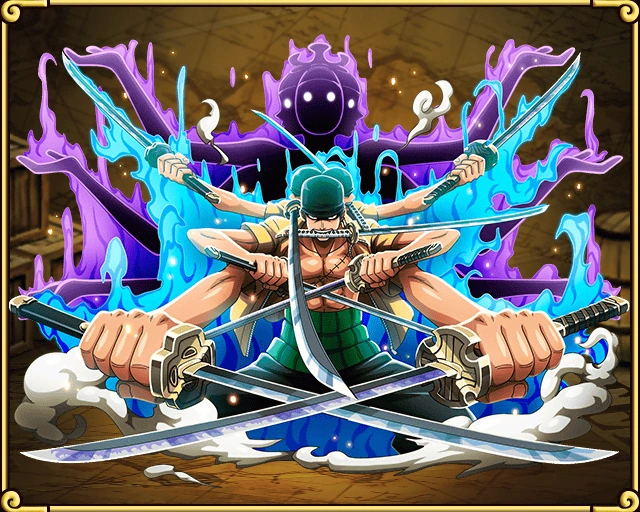
The final evolved version of the Zoro you get after clearing Shells Town is stronger than your starting Luffy, and will likely be one of your primary captains for much of the mid-game content.
Your STR team will be captained by Luffy until you get a better captain (your starting Luffy, even if evolved to the max, is at best an average unit, he has decent stats, but mediocre captain's ability and weak special, compared to farmable Arlong Sun Pirates, Blackbeard, or a Rare Recruit unit like Bartholomew Kuma Warlord of the Sea). With the addition of the Ace's Training Grounds you should upgrade to Portgas D. Ace Whitebeard's Son ASAP. Your DEX team will be led for a long time by Zoro (in his final form of Roronoa Zoro Ashura Ichibugin whose good stats and captain's ability make him a viable top-tier unit). For QCK team, the game will give you Sanji Diable Jambe Flambe, sadly he is a niche support character (sub) and you'll need a better QCK captain quickly. Same with INT, Nami's final form Nami Thunderbolt Tempo, which is pretty much useless, so you should keep your Nami in her niche but usable mid-form of Nami Mirage Tempo. Neither is your game-given Usopp very useful as Sogeking, but his mid-form Usopp Usopp Golden Pound is an amazing sub (due to his powerful special), who should never be evolved into his Sogeking form. Anyway, this means that you cannot rely on the original Straw Hats that the game will give you to do much (to recapitulate: Zoro makes a good DEX captain, Usopp is a great support unit as GPU, while Sanji, Luffy and Nami have very niche support usability). Oh yes, you'll eventually get a Franky, Robin, and Brook but by that point they'll be pretty useless too. However, when you get around to actually Super Evolving them, you'll find a very reliable character in 5+ Luffy, a good alternative DEX captain in 5+ Zoro, and a good 1.75x orb boost in 5+ Nami. When you do get the skulls needed for Super Evolve though, you're likely to have better RR captains, but this is a good note that y ou should never throw away characters that appear weak now as they may be powered up later on.
Anyway, for your team building, including vast majority of useful captains, you'll have to rely on two pools of characters: the lottery of Rare Recruit, and farming of story missions and recurring Extra Isle events. Since Rare Recruit is pretty much a gamble (so good luck and remember to pull only during Sugos), this guide can only offer some advise with regard to farming, i.e. will tell you which story mode characters are worth trying to get a poster drop.
| Good early-to-mid F2P tank Zoro DEX team | |||
|---|---|---|---|
| Captain | Subs | Friend | Ship |
| Requirements | |||
| |||
Beginner Guide to Clearing Content
Content can be roughly divided into story islands (the ones you sail between on the main map) and stuff available on the Extra Isle. The Extra Isle stuff is usually more difficult, through it usually scales in difficulty often giving you the choice to chose a difficulty level. The early story islands are very easy. You may run into your first defeats around Arlong Park, with Twin Cape and Alubarna being common stumbling blocks. Check the island page guides for how to beat it. Common newbie problems arise because bad team building (covered above) and low-level units (solved by doing more farming on missions you can clear).
If you have difficulties we did not cover, or workable strategies that we did not consider, please make a comment in the relevant island page, or update the guide yourself. Much content on this site is written by advanced players who simply forgot what early game difficulties and solutions they had.
Content around Water Seven and later is often compared in difficulty to the high-end, 30-stamina Extra Island content and is called "late game" or "advanced" content. It will take you several weeks of play to get to that anyway. The good news is that the guides for that content are usually more developed because it is where the more advanced players spend most of their time.
Beginner Guide to Farming
Farming means repeatedly completing a battle hoping for the character poster to drop. The odds of a poster drop are for the most part unknown, and seem to vary from battle to battle, with estimates of 1%-10% for usable characters (odds for evolvers are a bit better). First, you should only farm story mode characters during 2x Drop Rate days for that island (doubling whatever the chance is), or 0.5x stamina times. (Extra Island gets those modifiers very rarely, so you farm Extra Island whenever you want).
As for the Extra Isle, many but not all characters are usable. They are too many to list here, so check their pages for details. And yes, you can get them even from 5 Stamina battles (The odds of poster dropping however are very low for that difficulty). This guide will just focus on the early Story Mode characters you should try getting.
Important note for collectors: all characters up to and including Thriller Bark ones have been confirmed to be available during special Friend Points events, when the Friend Point pool of crappy 1-2 stars is replaced with turtles and story mode characters. While the odds of getting a good character (Luci, Croc, Eneru) are much lower then those of weaker ones (Shura, Gedatstu, etc.), you can relatively safely avoid farming weak, collector-only characters - you should get them from FP events eventually. Those happen every ~3 months or so (update: since mid-2017 you this is permanent). Our advice is - give it a year, and if you are farming, farm only useful characters you need for your team or evo material. The odds are good you'll get the weak story characters from FP or some special events anyway.
Since this guide has been written, several characters useful for farming have been released. Most notably, there are drop doubles - characters with a chance (or guarantee) of generating a copy of something that dropped in the adventure (they won't create a drop if you got zero, but they can copy anything else - poster, book, candy, cola, etc.). They include the Legend Buggy (who guarantees an double drop), RR Haruta, and F2P Baccarat Gran Tesoro Concierge. There is also Wicca (but her drop odds are likely lower than Baccarat so she is not likely to see much play as everyone upgrades to Baccarat ASAP). More double drop characters will be released in the future (JPN has Jean Ango).
On that note, there are also characters that increase Beli earned (see Daily:Weekends) and EXP earned. The latter include a free promo Trafalgar Law Straw Hat-Heart Pirate Alliance and RR Neptune King of the Ryugu Kingdom. JPN also has RR Perona, so expect this type of ability to become a bit more popular as time goes on too.
What to farm on early isles:
- Alvida's Hideout: get Alvida and evolve her to Iron-Mace Alvida Smooth-Smooth Fruit. She has decent stats and a very good special, and will make a very good sub for your early Luffy team, but will also find late game use). Note that you can also get this character with increased odds of a poster drop from the recurring Alvida's Romance Extra Isle event (such events come back every 2-3 months or so).
- Shells Town: Forget Axe-Hand Morgan (only usable as a very early sub, hardly worth the effort), but his brat evolves to Cabin Boy Helmeppo, whose special makes him a niche but occasionally very useful sub. Just like Alvida, 'meppo can be farmed also from a special event, this one being Escaped! Morgan event. As his special is more niche then Alvida, you can probably afford to wait for it.
- Syrup Village: Django evolves into niche but usable subs, (Dancing Django, and Double Crosser Django). He will also drop from Hina's Resort Getaway event. Similar to 'meppo, you don't need to hurry too much to farm him. Captain Kuro is a QCK slasher and a decent sub early on, through only for his stats. He is however farmable in his extra isle event too, and is obsoleted by a bunch of units, including other F2P drops, so don't think much of him. And finally, Usopp is farmable here, through the drop rate is rumored to be maybe 1%. Everyone is always desperate for Usopp sockets and GPU copies for skill ups, but the drop rate here is considered too low to be worth the trouble.
- Baratie: most useful is Double Ironfist Fullbody, known as Elder Turtle killer, a very useful character for turtle farming (note he also drops from the same Hina's Resort Getaway event as Django). Given that you may farm turtles up to 4 times a week, farm the hell out of his stage and evolve him ASAP. Chef Zeff is an early Fighter team captain, but his weak stats and special make him obsolete once you get better Fighters (and his rumored drop rate is very low to boot). Don Krieg is a very niche character, a poisoner probably only useful for Hime turtle farming ~2 times a year, and you can just wait and get him from the Crush Krieg's Assault event.
- Arlong Park: while you need the cow for one of the missions, it will drop from the Face The Deep-Sea Kraken event, so just wait for it. Much more interesting is the Enraged Arlong, who is usable as a captain (through obsoleted with some Rare Recruits), but whose pretty good stats (one of the highest ATK values in the game) keep him in play as a usable sub for a long time. He can be obtained from the Arlong; Empire Rising event too.
- Twin Cape brings us Laboon and Princess Vivi, both usable in the Zombie Team strategy. It belongs to another guide, but bottom line is both are good to have. You can obtain Laboon from the same Kraken event as the cow, while Vivi is also available from Whiskey Peak and from Rare Recruit as Miss Wednesday. You'll probably want to farm Laboon, unless you got Pell from RR, as for Vivi - you can wait until you pull her, or if you want your zombie team up and running fast, go and farm her here.
- Little Garden: While Dorry and Broggy have niche use, the only unit worth getting is Mr. 3. Sadly, his rumored drop rate is terrible, but the only other way of getting this useful Slasher INT unit is Rare Recruit, so...
- Nanohana ► Rainbase: Mr. 3 appears again, but more importantly, so does the awesome Mr. 0 Baroque Works CEO, better known as Crocodile. Both his evolutions have their uses, through Sir Crocodile Warlord of the Sea is superior. Anyway, he is not available from RR, so farm him until you get at least one copy. He is a great INT Slasher sub.
- Alubarna introduces Mr. 2 Bon Clay (a niche unit that combos well with strong and farmable Garp the Fist), niche but usable Slasher and damage reducer Mr. 1, and a very useful DEX booster Miss Doublefinger. You really want Miss DF for your DEX Zoro team, and if you run Slashers, Mr. 1 will find his place there for a while at least. Mr. 2 can be obtained from RR, so don't bother (unless you have Garp), but Mr. 1 and Miss DF are not, so if you want them (and you'll want Miss DF), go do some farming. And of course there is Croc, and he appears twice on the last stage here, which technically doubles the chance he drops there, making that stage a popular choice for farming him (once you are high enough level to make this battle easy).
- Jaya: Bellamy complements Miss DF and your DEX team, and like her, can only be obtained from the story missions, so go get him.
Now that you have cleared Jaya, you are no longer a beginner, so this guide will end here. Good luck farming Eneru :) Farming notes for further islands can be found on the said island pages.
New Player DON'Ts
- DON'T spend Rainbow Gems on anything until you understand the game. In particular:
- DON'T use Rare Recruit except during Sugo Fest days
- Stamina Refills may be tempting, but the later you use it (the higher your pirate level (P-LV), the more benefit you get from them. Before using a Gem, make sure that you have tried all five daily Transponder Snails, which can give you a free refill if you are lucky!
- Restarting a battle may be tempting as well, but is rarely worth it. Do it only if you have collected valuable posters (and except on Extra Isle this is unlikely to happen before you finish the boss anyway). It is usually more efficient to use the Gem on Stamina refill, and even that is not advisable.
- Expanding the Character Box is good, but don't spend all your gems on that at once. Do it when you are out of options and would have to throw away valuable characters or rare fodder (evolvers or boosters).
- DON'T use a good character or a rare evolver for powering up.
- For characters, if it has two stars or more, it may be good to keep. Yes, even some two star characters that appear weak at first glance can be useful later (for example Helmeppo). Make sure to favorite (star) any characters. If you're not sure whether a character is weak or strong, search, or ask. If you get a weaker version of a character you already had (such as another low-level Luffy), keep it until you understand how sockets and leveling-up skills work (both of those DO involve using good characters in power up, but it has to be the right character - and that's another guide).
- With regard to evolvers, do not, under any circumstances, use anything that has a rainbow color, or any dragons or lobsters for powering up. Early on you will also want to save your crabs (later on you'll have too many of them, but until you know you have too many, try to save them).
- DON'T use the Treasure Turtles for powering up the characters, unless you are pretty sure you know what you are doing. They give only 3k EXP anyway, and that's not much. Even more, understand that those turtles are the required evolution material for Pigs. Baby pig needs 2,350 EXP to reach max level, then 2 tiny turtles (worth 6,000 EXP) and a Sea Pony/small Penguin/Hermit Crab to evolve into a booster that gives over 50,000 EXP. For the same reasons, conserve your supply of the related evolvers.
- DON'T overspend EXP trying to level up a character. Check the character info here to see how much EXP it needs for the max level.
- DON'T spend Friend Points except if you are at max (99 pulls) or during special FP events which happen every few weeks and boost the crappy FP pool with some useful units (Rare Recruits, boosters and evolvers etc.)
- DON'T focus on the Story Mode too much. After you unlock the Extra Isle (by finishing Shells Town), it is a very good alternative, as the rewards there are better and relatively unique. Story Isle should almost never be attempted when there are no rewards (2x Drop, 2x Pirate EXP, 2x Beli, 0.5x Stamina). Out of those, 0.5x Stamina is best for rushing the Story, and 2x Drop is best for farming. 2x EXP may occasionally be better then Extra Isle, but the rewards (drops) are usually not as good, and 2x Beli is really just barely better then no bonus (because beli is relatively plentiful anyway).
- DON'T rush with the Missions just for the sake of completion. Check what rewards they give, and get them as you need them. Gems and turtles are good, but leave evolvers for when you need them. Unlocking ships is cool, but you won't have resources to max them out for a long time anyway, so take your time.
- DON'T waste cola on bad ships like Dinghy. Save it for better ships (for now max Merry Go, by the time you are done you should have a decent feeling which ships are playable. Or check the ship page for people's thoughts). On that note, do not click the Shipyard button at all until you get Merry Go (once clicked, you get a mini tutorial ad 5 free cola which they game will force you to spend instantly - and if you only have the crap-inghy, well, it will be sunk into that junk).
- DON'T evolve Usopp Usopp Golden Pound or Nami Mirage Tempo to their final forms. Their mid-tier versions are much better. BUT there is no warning message when evolving characters, so you should be really really be careful when evolving Usopps or Nami. I did evolve my Usopp accidentally (I was distracted and thought I was evolving another version of him). It cost me about a month of work (sockets, skills up). So BE CAREFUL!
- Zoro Streaming Wolf Swords is worth keeping too, through his evolved version has its use on a zombie team, so in this case ideally you want one to keep unevolved, and another one to evolve.
- Fortunately very few units have different specials after evolving, and those three are the only one who have useful specials that do not strictly improve after evolution.
- DON'T!!! waste your Feast item. It's a rare item that gives 5 million experience, given through mail on game anniversaries and such (the odds are that you probably do not have it, but in case you do, and wonder what to do with it - here it is). Keep it until you get a Sugo Legend, and feed it to said legend, since they need the most EXP to reach max level. Second best choice is to feed it to a Raid/Clash boss, if you are really impatient to max one (Eneru or Mihawk are probably most useful here).
- DON'T!!! waste your skull(s), they are an evolver material. It is wasted if used for EXP boost. But you don't need to keep more than one per character, any dupe skulls are trash.
- DON'T!!! feed your duplicate RR pulls to themselves hoping for sockets / skill ups without first considering that you could instead trade them to Rayleigh's Bazaar for 300 Training Points. Ask yourself - do you need those skill ups right now, or can you wait few weeks / months to farm books? Ditto for sockets. Granted, some characters are very difficult to socket, and for those, using a RR is roughly equal to using a Forbidden Tome you would get from the Bazaar, but... think carefully.
- DON'T!!! spend Training Points on low-cost Bazaar crap. Save it for ships/characters. Your first buy should be the Rocketman ship (but you may have to wait months for it to cycle back to the shop).
- DON'T!!! sell characters unless they are grunts describes in notes as useless. As a rule thumb, never throw away an RR character, and keep your FN and Story characters too.
New Player DOs
- DO log in at least once every day to get your daily log-in bonus and mail. No need to play if you are busy, just log in to the game screen, open and delete your mail. (Do not let your mail pile up as after you reach the max of 300 you'll stop getting daily and special rewards. Best to delete each mail as soon as you open it).
- DO use Transponder Snails (there are five of them each day). If you want to keep your Twitter account free of game stuff, start a secondary one just for this game. Those five daily rewards do add up.
- DO install the game on as many devices you have access to (your own, your family, friends, etc) to be able to do the Friend Game as often as possible (i.e 5 times a week). Update: Friend Game has been removed as of mid-October 2016, so forget about it for now.
- Once a week or every two weeks clean up your friend list by sorting it by "time". See who has not played for a week or so and drop them. Only players who played within 8 hours or so will appear on your friend captain list to choose from as an addition to your team. Any inactive player on your friend list is a one less choice.
- DO understand Guerrilla Turtles Times and try to catch them as much as possible on Daily:Monday and Friday quests. Also figure out what time your Transponder Snails and Friends Game reset.
- DO switch your ships on all 8 crews from Dinghy to Merry Go and use your cola to max it ASAP.
- DO try to use your stamina efficiently, real life time permitting. If you don't have time to do big battles, try to farm some evolvers.
- DO connect your account to Facebook/Twitter for easy recovery. Go to Others>Change Device>Change Device with SNS>Back-Up Date with SNS and follow the instructions.
- DO understand the STR DEX QCK INT PSY color dependencies and that different missions and events may require drastically different teams. All Extra Island missions have guides, check them out if you are stuck. Guides for Story Islands are few, you can write some too (hint).
- When you get your first and subsequent cotton candy if it is ATK or HP buff, feed it to your Zoro or another 2x ATK/2x HP captain, if you were lucky enough to pull one. If it is a RCV candy, feed it to your Vivi, or keep it for Eneru/Legendary Marco/Boa/INTIvankov. Don't feed it to a random character or a weak healer (if you are not sure, ask).
- DO practice to improve your PERFECT hit ratio. It may take few months but you will eventually get to the point that most of your hits are PERFECTs. DO realize that without that skill, you simply will not be able to do the most difficult missions reliably.
New Player Roadmap
(For Pirate Level 1-70)
- You'll first want to farm an Enraged Arlong Shark On Tooth or to start with, or use a Rare Recruit with some type of a Rainbow captain ability that lets you bring different units besides those of one color. This is because you'll have limited EXP from your early matches and will really only be able to level up 1 or 2 units at a time.
- Soon you'll hit a roadblock in story mode. Stop doing story mode and farm Extra Isle for a while. It's the BEST place to level up your units.
- Next you must master the Type Matchup team build. You'll want to get 2 units of each type (DEX, STR, QCK, INT, and PSY. As fortnights come, try and gather the units so you can balance your teams. The reason you want a couple of each type is you'll want to finish your attacks with the characters that are strong against that boss. So a DEX boss will destroy a QCK boss must faster than a STR could. See Gameplay:Type Matchups for more information.
- Once you have a balance of units, level up one 1000+ ATK character. Focus on one or two to be at highest. You'll get a LOT more damage out of one unit being really really strong as opposed to 3 moderate units.
- Use same color type characters to power-up. You get 1.5x EXP when using the same color as opposed to using a unit of another color.
- Favorite your characters that you work on. This ensures you don't sell them or power them up by accident.
- Expand your box with gems.
- Don't use Gems on anything but Sugo-fest for characters, except the aforementioned reason.
- When you get Usopp, evolve him to Usopp Usopp Golden Pound ASAP and STOP. One, if not the best character in the game for beginners.
- Skip all raids, don't gem just to win you impatient little gamer. Their time will come later.
Tips for Intermediate Players
(For Pirate Level 71-150)
- You'll want to focus on Extra Island most of the time as you will start to collect manuals and character copies for socketing. It will still be a while before you can do it in high volume, since you need to be able to clear 30 stamina isles repeatedly for that.
- What are manuals? Manuals give you a chance to lower the number of turns you must wait before using a special. This might seem insignificant, but as this game gets harder, you'll find stalling can be a challenge and you MUST lower cool-down on units.
- Which units to save? Looks for those that boost attack, boost orb effectiveness, grant a conditional attack, heal, or have a high ATK value.
- Every two months on average, a 2x skill-up event occurs. This doubles the chances of lowering a cool-down when using a manual or character with matching special. Keep your manuals and character copies for that time.
- Which sockets to keep? Good ones: Bind/Despair reduction, Auto-Heal, Charge Specials, Matching Orb. Everything else is considered weak. See our page on sockets.
- If you run out of space, increase box space, then start eating weaker-character manuals/copies. Don't keep too many evolvers, but treasure your Sea Stallions, rainbow evolvers and lobsters. Without these characters you can really cause the game to bottleneck and prevent progress and evolution of your units. Do keep in mind that Sea Ponies and Robber Penguins and Hermit Crabs are Pig (Porc) evolver fodder, so actually the most useless evolvers are Pirate Penguins and Armored Crabs. Don't keep more then 1-2 of those.
- Begin to plan out your character attack order before attacking. You'll only get a one character advance notice of who is targeted next, and this can be not enough time to switch attack to a different enemy. Look at unit cool-downs and start practicing switching targets when needed. It's a skill you'll need for Forests or at times, Raids/Clashes later in the game as you get more powerful.
- Planning stalls: Some raids or FN need you to stall at certain times. Learn your unit cooldowns, specials, and where to use GPU to maximize the stall time. Remember that units with high defense can easily die to combo hits from high-combo characters.
- Specials that work together often form "Burst Teams", teams that after releasing numerous specials on the final turn can take down the boss by doing several times as much damage as on a regular turn.
- For how to get a Full Board Orb - see Full Board Orb Controllers
- Characters that increase Orb Chance generation like Thatch, and Shanks Black Clad Emperor can be used instead
- Both of the above can be increased in duration through Orb Locking characters like Paulie - if you find a spot for them in your team.
- Your team will probably also want one Damage Reducing character like Alvida, or Smoker
- Getting a matching orb is only one step for full damage burst. You can further multiply this three times with a matching orb booster (ex. Donquixote Doflamingo Warlord of the Sea), class or color burst (ex. Nico Robin), and against enemy burst (ex. Sadie Impel Down Chief Jailer). See this guide for details.
- Now is the time to start planning a strong team to take down raid and Coliseum bosses. Mihawk, Chopper, Garp and Blackbeard are among the easier ones. Doffy and Enel are much harder, but those characters are the among the best. Either way, all can be completed before you hit P-LV 100, and without too much or any gems spend - but you will need to study the guides, get a bit lucky with unit pulls/drops, and work on your perfects. Also, don't despair about the high difficulty levels, go for the easiest ones - and repeat them until a poster drops, then stop. You will come back to farm them later, for now focus on leveling your new F2P prize.
- When cleaning your friend list, you will also want to drop anyone who is 80 or more levels under your current P-LV. Each 10 levels reduces their appearance on your list by an hour (to a min. of 1 hour), and 8 hours is the default time.
Intermediate Guide to Team Building
At this point you likely have one team of each color, and some variations based on your best captains, likely from RR. Hopefully you have at least one Legend. You are farming some fortnights and doing easier Clashes!!, at least, and you check their guides, notes on team-building for them, and adjust your teams as needed. For turtle times, you have one or more teams based on suggested turtle teams in the respective guide. Two general tips:
- be considerate and leave your best turtle/fortnight/clash captains in some slots, so that others can use them even if you are not running a given event
- for events when you want two different captains (one as a friend and one your own, let's say Zoro and Law), and when you have both,and when you have difficulty finding the right match, use the following trick: put both captains in different slots, perhaps leading a mirror team. If you need Zoro, chose Zoro team for the mission, chose a Zoro helper, then swipe the team to Law. If you need Law, reverse the choices. This way you will have the most choices, while being able to run two different captains.
Tips for Advanced Players
(For Pirate Level 151+)
- You really want to focus on collecting manuals for maxing out your characters, and on collecting character copies for maxing sockets.
- Cash won't really be an issue now that you are farming raid bosses.
Cotton Candy and how to use it
- Cotton Candy transfer: Cotton candy is super expensive to add to a 90+ level unit. Add them to evolvers first, then add that evolver to the 90+ unit. This will be MUCH cheaper than just feeding cotton candy directly to the unit. Crazy I know!
- Scenario 1:
- Unit A has no Cotton Candy
- Unit B has + 1 ATK Cotton Candy.
- Unit B is fed to unit A.
- Unit A will now have +1 ATK Cotton Candy.
- Scenario 2:
- Unit A has +10 ATK and +10 HP
- Unit B has +10 ATK
- Unit B is added to unit A
- Unit A has +20 ATK and + 10 HP
- Scenario 3:
- Unit A has no cotton candy
- Unit B has +1 ATK cotton candy
- Unit C has + 1 RCV cotton candy
- Unit C is fed to Unit B
- Unit B has +1 ATk and +1 RCV
- Unit B is fed to Unit A
- Unit A has +1 ATK and +1 RCV
- To further clarify the cost issue, keep in mind that the cost of feeding any unit to a character equals the target character level x 100 beli. So if you have a MAX Level = 99 character, each unit you feed to him costs 9900 beli. Cotton candy is beli, so feeding such a unit a portion of 5 CC means spending 50,000 beli. But if you feed that CC to a trash unit, then feed said trash unit to the Level 99 character you pay just 9900. Well, feeding CC will cost you a bit too, but overall you can save a bunch of beli that way. It only matters if you are feeding things to high lv characters for whom CC EXP is no longer significant and if you want to save beli.
- Cotton Candy Limits
- Each unit can have a MAX of 200 total cotton candy.
- Each type of cotton candy can have a MAX of 100.
- So a unit can have +100 ATK and +100 HP. It can have +100 ATK, +50 HP and +50 RCV... but it can never go above 100 for any specific stat, and never go above 200 total for the unit.
- As a result, save your RCV candies. There's generally no point to adding them to Mihawk who has no need for them. However, adding them to Marco the Phoenix Whitebeard 1st Div. Commander, Emporio Ivankov Revolutionary Army, Mansherry, or Corazon Donquixote Pirates make a ton of sense as they heal more with each RCV value. Usually, people MAX out Eneru, Lightning Incarnate 200,000,000 Volt Amaru with +100 RCV and never regret the decision due to his Post Turn Heal.
Still confused? Okay, here is the complete dummies guide to getting the most out of the Cotton Candy for your Beli.
So you've just finished grinding runs on Restaurant Le Crap and now your box is over limit with Cotton Candy. You're about ready to use all of them on your favorite character but realize it'll cost a bajillion-zillion beli. Before you give up, there is hope on the horizon, for you see you can give all that Cotton Candy to your favorite character at a fraction of the cost. no way must be a scam you say, but wait it's not a scam and on top of that it's super easy.
STEP ONE


First see how many berries it would cost to put 1x Cotton Candy on a character. As we can see from the example here it'll cost us 10,900 Beli just to add ONE Cotton Candy to our favorite character, and if we wanted to add more than one it would cost us a whopping 54,500 Beli! So with that in mind we move on to...
STEP TWO


Now we find some little evolver character we don't care about and give all the Cotton Candy to them. HA HA funny joke you say, but it's no joke, here we have a little Sea Pony and we're gonna give him all our ATK Cotton Candy, this time it'll only cost us 4,400 Beli, WHAT A DISCOUNT! Now that this little pony has an abnormally high ATK we will move on to
STEP THREE


Now comes the fun part, so if you've made it this far and think you've just wasted Cotton Candy on some useless character, you're about to become a believer. We go back to our Blackbeard here and put our little Sea Pony in his level up slot, what's this? it'll only cost us 13,900 Beli to Level up Blackbeard with this pony? and that pony has MORE THAN ONE Cotton Candy on him! Well now isn't this a smart idea. As long as the amount of Cotton Candy you're trying to add doesn't exceed the 100 Cotton Candy per type limit AND the 200 Total Cotton Candy Limit, you're good to go, here we see a Blackbeard that could have 19 (all i have at the time) Cotton Candy applied at once.
STEP FOUR
Basking in the Glory. So you've added a bunch of Cotton Candy to your favorite character and still have Beli left over for important things, now all you have to do is wait for the next Restaurant Le Crap and repeat the process
- To maximize return, it's important to plan what characters you want to give Cotton Candy to, and how much you want to give them. For example, I'll keep feeding my Sea Pony all the RCV Cotton Candy I get until it is holding 100 Total RCV Cotton Candy. Then I'm going to feed it to an Enel to help his post attack healing numbers. I'm going to keep the types of Cotton Candy Separate so I can pick and choose who I give them to.
- One of the best reasons for giving most all of one type of cotton candy to a "holder" character is that instead of each cotton candy taking up a spot in your box you now only have as many as holder characters, if you've separated the types among your holder character you will only need 3 (4 if you are lucky enough to have dropped the ALL TYPE Cotton Candy) spots in your box for all your CC.
Glossary
Some abbreviations and other terminology commonly used in this game may be a bit confusing, and some concepts need a bit of explanation, so here they are. Also, note that official game terminology is not consistent, and often not used by the players on the Internet (as they often rely on fan-translations of Japanese version, which gives rise to different terminology based on how some guide authors translate some Japanese words, further compounded when the game's official release decides to use yet another translation). Which is why for a number of terms you will see notes on alternate names for those concepts.
- Almighty Manual - Just like manual has the (same) chance of leveling up a skill, but can be used for any character. In other words, it is a universal manual.
- Armor - Hidden stat that enemies have that reduces damage dealt to them by said amount.
- ATK UP - a buff for you or enemies increasing ATK.
- ATK DOWN - guess.
- Attack - a base value of your characters and enemies. Attack, after applying buffs and debuffs, more or less equals damage taken by enemies.
- Bazaar - see Rayleigh's Bazaar
- Base Damage - See fixed damage.
- BB - Blackbeard
- Beatstick - A character with high ATK value.
- Bind - Also known as lock, or chain, a common enemy debuff against your team visualized by a chain ribbon on your character button (see picture). Affects any member who cannot attack or use special while under bind. If your captain or friend captain is affected, they will lose their passive abilities, but it does not affect HP (unlike despair). Also known as chain (being chained) or locked.
- Blindness - An enemy debuff visualised as a crossed eye (see picture). It removes the SFXes for a set period, meaning you don't see the expanding/collapsing circles of said SFXes that are a visual aid for making it easier to hit great/perfects. In practice, it makes it more difficult to hit perfects for players used to this visual aid.
- Boat - ship. Doh.
- Bother - A bad orb that looks like a dark skull. Bother and bomb orbs are discussed in FAQ but basically it is a weak orb that cannot be changed by most specials unless they say so specifically (ex. Jerry Cipher Pol No. 6).
- Bomb - A bad orb that looks like a bomb. Bother and bomb orbs are discussed in FAQ but basically unless you hit perfect or miss on it you will take some damage.
- Burst - The use of matching (flashing) orbs, probably boosted by various specials, to deal a massive amount of damage during a final turn.
- CC - cotton candy
- Chain - Hitting at least GREATs, and preferably PERFECTs to build up attack multipliers. Sometimes can mean bind (debuff).
- Chain limiter/reducer - reduce or cap your chain multipliers. See picture guide for more. Usually you don't want them, but see also the discussion linked from Empress Boa Hancock Kuja Pirates Captain.
- Colo - Coliseum
- Combo - see FAQ. Also see Defense.
- Cooldown (CD) - can refer to either Special Cooldown (desribed elsewhere here) or enemy cooldown, which means how often they attack (ex. enemy CD=3 means every three turns). Enemies often have variable starting cooldown which means that they can spawn with CD as low as 1 to as high as (usually) 5 regarding when they will attack for the first time. Then they usually enter their regular CD, attacking every x turns.
- Counterattack - an enemy buff represented by a fist (see picture). An enemy with it will usually reflect a portion of damage you deal to them at a specified point. Best counter: a powerful shield or just kill them before they attack. (Well, you can also avoid attacking the, but that's rarely a winning strategy :>)
- Damage reduction - Enemy buff that reduces damage you deal to them. Comes in a number of variants. See picture guide here.
- Debuff Blocker - Immunity. See FAQ for buffs and debuffs.
- DEF UP - an enemy buff that increases their defense. It can be so small that it doesn't affect the game, or very high, in which case it does, but the game will not tell you how big it is - you have to check the guides.
- Defense - an enemy stat representing armor (basic damage reduction). It reduces the amount of damage you deal to enemy with each character attack, both regular and special. Usually it doesn't matter, because it is very low, but sometimes (for the few enemies with very high defense) it does matter, so read on. Def can usually range from 0 to few hundreds, with very rare high def enemies having def value in thousands, some of them over 50,000. According to this discussion, "defense is subtracted from EVERY combo hit, not just the total attack". So for specials, it is an easy calculation: if your character has a special that deals 1000 damage and the enemy, 200 DEF, you'll deal 800 damage to them. For regular attacks, you have to divide your character's damage by their combo, then subtract enemy's DEF from each partial attack, so for example, if you have a character with an effective (after any buffs/debuffs are added) 1000 ATK, 5 combo, and enemy with 100 DEF, you'll deal (1000/5-100)*5=500 damage with your attacks. So for total damage, low combo characters are better than high combo, but since 99% of enemies have low defense, nobody usually cares about combo value. Defense is bypassed by fixed damage.
- Despair - Also known as gloom, silence, or seal. A common enemy debuff against your captain and/or friend captain visualised by the Gloom words on your character (see picture - but is has the JPN wording for this). Despair turns off all passive abilities, including HP boosts, which means that teams with HP boosting captain immediately loose all extra HP they had. (A Monster Chopper-like team will actually see their total HP bar expand for its duration...).
- Doffy - Doflamingo
- Enel - Eneru, Lightning Incarnate 200,000,000 Volt Amaru
- Enrage - Also known as haste. An enemy buff represented by a red skull/face (see picture). Once cast, it eliminates any time delay debuff you might have cast on the ene resets their cooldown to 1 (meaning they will be attacking every turn from now on), and may increase their attack.
- Feast - a very rare item given to players occasionally that will give a character 5 million EXP, instantly leveling up to the max level even legends.
- F2P - Free to Play. A bit confusing when used, as it refers to non-RR units (even through all players, including F2P players, get gems that they can use to pull some RR units). A F2P team is a team not using any RR units.
- Fixed Damage - Sometimes known as base or true damage, one that bypasses armor (aka defense). Poison is fixed damage.
- Forests - Forest of Training
- FN / Fortnight - Missions on extra island that last 2 weeks. Well, in fact they last 2 weeks when they are introduced, and only a week when they eventually rotate back.
- Forbidden Tome - Used to give a character a new power (to go in a socket).
- G2 - Monkey D. Luffy Gear 2 Final evolution of your base story mode Luffy.
- G3 - Monkey D. Luffy Gear Third Useful Rare Recruit Luffy that is often used with another as friend captain in Clash!! events.
- GPU / God Usopp - Usopp Usopp Golden Pound Very useful crewmember as his special can delay all (non immune) enemies by 3 turns. A staple of most great teams. (This unit should not be evolved!)
- Gloom - See Despair.
- Goku - Sengoku the Buddha Very useful unit for a Rainbow Team, as his captain ability will triple the attack of himself and all crew with a cost of 20 or less.
- Grunt - Common, low level enemy unit that nobody cares about.
- Halloween Zoro - Roronoa Zoro Jack the Ripper Good slasher with time delay special.
- Haste - see Enrage.
- Hit barrier - enemy buff that requires you to land a certain number of combo hits, or great/good/perfect hits on the enemy before they take any damage. See picture guide.
- INTHawk - Hawk Eyes Mihawk World's Strongest Swordsman
- Immunity - also known as debuff protector visually represented by a yellowish hexagon (see picture). An enemy buff that makes them immune to all debuffs you can cast on them (ex. time delay, ATK/DEF down, etc.). Sometimes it comes in a weak version, ex. making the enemy immune to time delay only; such reduced immunity has another symbol attached to the main hexagon.
- Legend(ary) - A Sugo-Fest exclusive character.
- LL - "Log Luffy" referring to Monkey D. Luffy Voyage Dream: Pirate King (the evolution of "Voyage Log") or his newer replacement Monkey D. Luffy A Vow in the Great Age of Pirates – Pirate King
- Lock - See Bind. Alternatively can mean locking slots in place for a turn or rarely, more (ex. from Hina's special). Locked slots only lock against the regular turn reshuffle which gives you a new slot after you've attacked with a character. Locked slots do not guard against yours or enemies forced changes of the slots. This means that enemy specials like FN Brooks, or your specials like Vivi's or Gladius', etc. WILL reshuffle/change the locked orbs.
- Manual - AKA Skillbooks, used to level up specials.
- MC - Tony Tony Chopper Post-Rampage / Monster Chopper
- 'meppo - Cabin Boy Helmeppo Can reduce enemy defense to 0 for 1 turn...nuff said.
- Mirage Nami - Nami Mirage Tempo A good unit that is used for her special ability to make INT attacks deal no damage for 1 turn. (It is recommended that this unit not be evolved)
- Orb - What the game calls Slot. There are many different slots, most common are STR, DEX, QCK, PSY, INT, RCV, amd TND, Orbs can also be empty, and later in the game you'll run into bother and bomb orbs. See FAQ for more on those. Lao G. has special G. Orbs that can be read about here
- Overcost - Game warning that a character's cost is too much for your team. Increase your P-LV... go deal with it.
- Numbness - Could refer to paralysis of special bind.
- P-LV - Pirate level, often incorrectly referred to as Player level. Determines your stamina and cost (each time you increase it you get 1 stamina or +2 MAX cost limit, alternating).
- Paralysis - A type of enemy debuff (see picture for visualisation, called numbness there). It seems to have a set chance (roughly 50-90%, varies depending on enemy that casts it) of cancelling character's attack (not specials or captain's abilities) for few turns. If paralysis is triggered it also counts as a miss, so you'll lose meat orb from the previous character.
- Poison - both an enemy debuff cast by enemies on your team and a character ability you cancast on enemy. If used by enemy, your team will be poisoned, and will be taking a set amount of damage (usually in the range of few hundred HP) each turn. If cast on enemy, it will deal an amount of damage (usually equal to 50% of a casting character's ATK, unless it's strong poison aka venom, where it is 500%) to one or all enemies. Poison is Fixed Damage, and therefore useful for killing enemies with high DEF, low HP. Poison cast on enemies will go away after clearing a set stage, however if you kill only some enemies on a stage, and they respawn, the new ones will be also affected by poison (as long as it was cast by a character whose poison affects all enemies).
- Power - See Socket.
- Raid - Refers to the Clash!! 24 hours events that appear on the Extra Island, read more here
- Rainbow - Refers to teams of more then one color, usually led by a captain that does not care about one color but a class (like Chef Zeff, Arlong, Jimbe, etc.) Or simply has no restrictions on whom they helps, like G3, LL, Sadie, Sengoku and so on.
- Resilience - can refer either to Resilience socket/power or to enemy's buff ability. Enemies with Resilience buff cannot be killed with regular attacks (but they can still be finished with a special, poison, or any other damage that is applied to them outside of regular attack).
- RCV - It can mean either a recovery orb (meat) or the character's RCV stat. For what is Recovery, see FAQ.
- RCV down - an enemy debuff drastically reducing your team total RCV value, usually close to 100 or so. In effect it means you will not heal much from your meat until this debuff goes away.
- RR - Rare Recruit
- Seal - See Despair.
- Shield - many debuffs and buffs use shield. See pictures here and here.
- Skull - an evolve item to evolve certain 5- and 6-star characters to their 5+ and 6+ versions, respectively.
- Silence - See Despair. Could also refer to special bind.
- Slot - See Orb.
- Skillbook - See Manuals.
- Special - the ability of a character that requires several (at least) turns to charge before it can be used. The time that you have to wait for the special to be ready for is called Special Cooldown.
- Special bind - also known as silence or numbness (see picture for visualisation - note it is called silence here). It also turns your special charging bar to gray. A type of enemy defuff that will lock your specials for several turns.
- Sockets - Special abilities like Auto-Heal that characters can get. Technically those abilities are called Powers, and go into Sockets, but most people just talk of Auto-Heal sockets rather then Powers. They are discussed a bit more on a dedicated page.
- Stalling - Using a time delay character like GPU.
- Super-evolve - using a skull to evolve a 5-star character to 5-star+ or a 6-star legend to 6-star+ version.
- SWS - Zoro Streaming Wolf Swords
- Target lock - an enemy ability which forces you to attack a specified enemy (disables manual targeting). (See picture guide for visualization). Goes away once the target enemy is dead. Does not affect mass damage, so often a good counter is to use a mass damage ability like that of Thousands Sunny, which will clear the untargetable enemies anyway.
- Tank - 2x+ HP Captains.
- Time delay - a debuff you can cast on enemies to delay their attack by 1-3 turns. Visuall represnted by a white-ish clock appearing on enemy characters. A delayed enemy cannot be delayed again until they attack. If you kill some delayed enemies and new respawn, they won't be affected by time delay but you still cannot use a time delay ability until the ones affected by it have attacked or are dead.
- Towel Nami - Nami Happiness Punch A good orb manipulator and 2.5x ATK boost captain for INT teams.
- TND - Tandem. Probably a tandem orb. Tandems suck, just forget about them. So do TND orbs.
- Venom - refers to strong poison, 10x as strong as regular poison. See more at notes at Sir Crocodile.
- WB - Whitebeard
- Z - Zephyr
- Zombie - while it can mean zombie grunts that appear around Thriller Bark, usually it refers to Zombie teams. Explaining those is a bit more difficult, so see FAQ below.
General FAQ
Q1: Can I play this for free and be successful?
A1: Yes, it will just take you a bit more time (grinding/farming stuff). Also, with the amount of free Rainbow Berries the game gives you, you won't really need to buy any if you can save them up.
Q2: I played this for several weeks and I still can't clear much content...
A2: Doh. This game takes a lot of grinding, AND you have to wait sometimes months for some FNs to rotate in so that you can get key characters. And you need to collect the gems and pull some nice RR. It takes months. I am writing this guide after 6 months of playing, and I still cannot clear 100% stuff. I expect in another six months I will be there. Patience. Go grind rather then complain here.
Q3: Do I have to re-roll for legends?
A3: No, not at all. All content can currently be cleared with F2P units, and you get gems like Christmas so you will most likely do some RR pulls to supplement your F2P units.
Q4: How do I evolve character X?
A4: Check the wiki page for that character
Q5: How do I find evolution material X?
A5: On the Extra Island on different days, or in particular missions. See pages on Crabs, Penguins and Lobsters. Dragons do not appear in the story isles, while Lobsters appear on Extra Island very rarely and you should look for them in Story missions. If you are looking for Skulls, Straw Hat ones drop from the 32DY story island, and legend ones from special events associated with them (like WB's skull from Ambush! Whitebeard). Skulls should also be available for purchase from the Bazaar.
Q6: What are the chances of [x] dropping?
A6: Nobody knows exactly, except of the maximum stamina Clashes, which have a 100% boss drop rate, and some evolvers on Extra Isle (some, for details see User: Piotrus/DropRates). Few general rules: 1) Drop rates are lower for more useful characters. 2) Some drop rates appear to be as low as 1%. Sigh. 3) For 30 stamina Extra Island events, there is a maybe 95% or so chance that something will drop from each stage. 4) Drop rate for Clash bosses on non-maximum Stamina event are estimates between 15%-50%. 5) Remember that your chances double during the Drop x 2 time for a given Isle. Finally, chances of specific item/poster dropping during a 30 stamina FN are calculated here.
Q7: When is a fortnight [y] combing back?
A7: Nobody knows, and they don't follow a pattern. In half a year I've played, for example, I've seen some fortnights come back up to three times, some just once, and at least two - not yet at all. The time interval can be as low as one - one and a half month to over a half a year... FN rotate every Wednesday (there is always a 2-week long new FN, and two repeating one week long FN). See also Feature Film Frenzy.
Q8: When is a clash [y] combing back?
A8: Again, nobody knows. They are two clashes a week (Monday and Friday). Sometimes we get extra clashes with events such as Clash of Clashes, which may mean a 5-7 clashes in a week, one of each day. At worst, you may have to wait two months for a particular clash, but it is also possible to see the same clash 2-3 times a month. See also Feature Film Frenzy.
Q9: I hear that in many FNs specific grunts drop specific items. Should I restart the game if I don't get the drop from specific character I wanted?
A9: Nope, those are pre-determined at battle load, so restarting the stage will not change the drops. In other words, what drops is pre-determined the moment you enter the battle. However, this does take us to discuss another trick...
Q10: If I used a random damage special such as from Monster Chopper, and I didn't get the value I wanted, should I restart the game?
A10: YES! Those are not pre-determined at the start of the battle (like drops), so if you would lose the battle otherwise do restart it (close the app, reload game, reopen battle) and try the RNG again.
Q11: When is a "double skill up event"/"FP event"/"Hime event"/"Restaurant Le Crap" etc. combing back?
A11: Seriously, nobody knows, and as usual they do not follow a clear pattern. Every 2-3 months for a given event is a good average, but intervals for such events have been known to be as short as 1.5 months to over 4, so... shrug.
Q12: What do various buffs/debuffs mean?
A12: Touch them for a short explanation. For a longer one, see here and here
Q13: Which damage boosting specials stack?
A13: See this guide
Q14: I got a power/socket. Which should I keep?
A14: Good ones: Bind/Despair reduction, Auto-Heal, Charge Specials, Matching Orb. Everything else is considered weak. See our page on sockets and this guide for more
Q15: Will my special skill up / socket / candy buff disappear after evolving?
A15: No. The only exception is a skill up for the very few characters that get different skill up after evolving (Golden Pound Usopp being the main character to consider here - he should never be evolved to his Sogeking inferior variant!). Sockets and candies are always preserved.
Q16: I have a question about Coliseum.
A16: Read the Coliseum and ask questions there.
Q17: What is a recovery stat for my character / team?
A18: Recovery stat for the team is the sum of all of your characters recovery stat. If it ends up being negative, is effectively zero. When you eat a meat orb during battle, you will recover that many hitpoints. Minimum is zero, you cannot lose HP from meat.
Q18: What is the combo stat for a character?
A18: Not very important. It is how much damage you do if you miss or hit perfect with a character without bypassing enemy's armor. Practice on turtles or crabs and you'll figure it out. See also Defense in glossary.
Q19: How do orbs work?
A10: A matching (strong) orb will give you a 2x damage boost. An opposite (weak) orb will halve your damage. RCV orbs let you regain health unless you miss on them or hit a perfect and blow the meat away. TND orbs let you activate tandem attacks, but as tandems are weak, so just forget about them and think of them as useless no effect orbs. Empty orbs are just empty and do nothing special, and so are more or less like tandem orbs. Black-ish "bother" orbs are simply weak for any character, they are also somewhat immune to characters specials that randomize orbs, so be careful or you may waste a special on them. Bomb orbs work like a meat orb, but you don't want to "eat" them. So you either want to miss on them, or hit perfect to blow a bomb orb away. Otherwise you'll take damage.
Q20: I can't hit perfect with some characters / how do people make G3 teams work?
A20: Practice, practice, practice. If you have RL time but no stamina, practice in Training Forests, too.
Q21: How do I beat stage/mission X?
A21: Check the guide for that event. If the guide is missing, ask.
Q22: I really, really cannot beat stage/mission X. What do I do?
A22: Farm EXP and posters from previous Story Islands and Extra Isle, and read the guides.
Q23: Can you help me make a good team?
A23: Teams that can clear various events are listed on the guide pages for those events. More can be found on youtube or in comments. It's a wiki, so if you find a team that can clear something we don't list yet, edit and add the team, or at least post it in the comments. If you are just starting, go back to the top of this guide and read the section about team building for beginners; it should tell you enough so you can clear a few dozen or so story missions at the very least.
Q24: I got a Forbidden Tome or an Almighty Manual, who, do I feed it to?
A24: Best use is Legends who do not have farmable versions for socketing, or ones whose books drop rarely and with low odds (read: Boa). See also discussion here.
Q25: What is a zombie team strategy?
A25:Zombie team strategy means using a team that cannot die, relying on captain abilities that either prevent damage or resurrect you upon death (while the latter could be also achieved with Resilience buff, as it is not guaranteed to trigger nobody uses it). See detailed the notes at Loss Prevention category.
Q26: This Wikia does not have answer/guide to X, Are there other good guide pages?
A26: Sure, but keep in mind you can update this Wikia here with all information you discover, so eventually it should be the most complete (just like Wikipedia or like most other Wikias out there have replaced more traditional game guide pages). Given its business model, Wikia is much more likely to be around, unlike blogs or minor fansites which disappear when its ops loose interest or funding (this already happened to two or three OPTC fansites...). Anyway, guides worth checking are:
Q27: Should I keep character X or sell them?
A27: Always keep a copy of each RR, story and FN character, except grunts. Check notes for the character. If they say they are useless you can throw them away... probably. Even useless characters can become useful one day when a matching combo is released. Some got super evolution, too.
Other guides/useful sites
- Reddit OPTC wiki: https://www.reddit.com/r/OnePieceTC/wiki/index - but it is half-obsolete as it is not open to editing by newcomers
- OPTC github tools: https://optc.github.io/ are worth exploring
- OPTC Official English Site: http://onepiece-treasurecruise.com/en/ - has decent guides and basic character / story mode information. Not bad for an official page
- OPTC Eng Blog: https://op-tc-eng-version.blogspot.com/ is a good fansite with a bunch of guides.
- OPTC Guide: http://optcguide.com/ - I haven't used it much but is seems fairly up to date.
- OPTC Academy: http://optcacademy.com/ - seems focused on the Japanese, not Global version.
There are also Japanese pages:
- http://onepiece-treasurecruise.com/ Official Japanese site
- https://トレクル.gamewith.jp/ "Gamewith" is considered a very useful fansite - for those who read Japanese. Otherwise, you can get a bit of use of it through Google Translate.