| [[File:|thumb|center|150px]] | |||||
| Chapter | Stamina | Battles | Quest | Boss | Conditions |
|---|---|---|---|---|---|
| |||||


| Chapter | Beli | Experience | EXP/Stamina | Rainbow Gem | Title Gained | Conditions |
|---|---|---|---|---|---|---|
Fully Destroyed |
Clear Chapter 30 times
|
5x Rainbow Gems |
|
Farming notes[]
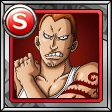
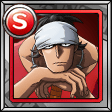
Saint Charlos is a STR variant of Cabin Boy Helmeppo, so usable, if niche. Sentomaru Marine Science Unit Commander, Eustass Kid Supernova and Trafalgar Law Supernova are ok as subs, through hardly essential for anything. Pacifista's have decent stats but no sockets, and their special maxes out at CD 20... hardly worth a bother, through if you have LegendAce, they could occasionally see use as a the 6th shoother in a given color. Very very niche at best. Overall, while not disappointing, nothing here is a must-have.
How to Beat Sabaody Archipelago[]
- Chapter 1
You will face 3 named enemies on this stage. They will first come solo each and the 3 of them together on the last battle. On the last battle they all start with 50% of their respective hp.
Gyaro (9200 ATK, 3 CD, 445,950 HP) limits your max chain multiplier at 2 for 5 turns as a first strike. Under 20% he boosts his own attack. (need confirmation on the amount)
Tansui (6769 ATK, 2 CD, 489,930 HP) can't be knocked out for 3 turns as a first strike. Under 20% he deals 10k damage.
Macro (3883 ATK, CD 1, 555,000 HP) uses "paralyze gun" on the middle row, having them completely miss (0 Damage and breaks the chain, can't even use meat) at a random chance (50%?) for 5 turns as a first strike. Under 20% he locks a random unit which can include captains for 5 turns.
Use Double Eneru, out-heal whatever they do , and they'll go down in few turns. With Double Eneru you will be fine for the next few missions.
- Chapter 2
Grunts. They have between 100k-300k HP, and attack from 3k-8k on CD 1-3. One of them introduces a "lock" penalty - forces you to attack him first, disabling manual targeting until he dies. Not much of an issue at this stage, as you could kill the grunts in any order anyway.
- Chapter 3
More grunts. Lock + 4 hit shield on the lock grunt. Again, Double Eneru has no problems here. Also, note that only the lead grunt has a hit shield, so a TS will hit all others.
- Chapter 4
Same old grunts, but this time each one has a 4 hit shield. This may be a bit tough as you may not be able to take down more then one grunt at a time, so you should try to bring a tanky team to absorb some big hits as each of the shooters hits for something under 4500 (I was ok with 14471 HP, tanking 3 of them but not by much). Bring a time delayer to make this much easier. GPU is never a bad idea.
- Chapter 5
New grunts! Strong-Arm one hits for ~7000 and if HP is less than 50% at the end of your attack, they will activate certain things irregardless of whether it is their turn or not. The STR Grunt will activate a "damage multiplier halved" buff for 3 turns. PSY Grunt changes all slots to characters weak orb or a BOMB slot. Quick-Strike ones hits for ~4500 seems to have no abilities or triggers. The old "remember Kaya" ones hit for ~2000 and have no triggers or abilities. The black Scheming Gunman throws a healing each turn, but just for 50k. The QCK version of her will cast ATK down for several turns if under <50%. She attacks for 2766. Double Eneru again has an easy time here.
- Chapter 6
Old grunts are back. This time rather then a hit shield they have (in addition to the lock) a paralyze gun (on the middle row). Just burst them - double Eneru clears another stage easily.
- Chapter 7
Regular grants (two giants and two canoneers) on the final stage. But they do have a lot of HP and pack a punch. Double Eneru can do it, but you will probably want to use some staller and damage reducer while you are taking them out if you cannot burst them on the first round.
- Chapter 8
You will face Strong-Arm Gunman (7,704 ATK, 3 CD, 256,551 HP) Technical Gunman (5,184 ATK, 2 CD, 218,067 HP) Bold Gunman (7,704 ATK, 3 CD, 256,551 HP) and Saint Charlos (2,100 ATK, 1 CD, 500 HP). Saint Charlos puts up a 99 hit barrier and 99 turn immunity every turn, as long as the bodyguards are alive. After the 3 of them died, he switches to dex and is a onehit-kill. This is not particularly annoying, double Eneru can handle it again, just burst on the final stage, take out most of the grunts, and then tank and deal with the rest of the bodyguards.
- Chapter 9
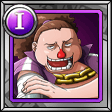
This is the first really difficult mission here (as in, the first I failed few times before clearing it). On the 5th stage you will face Saint Roswald with his body guards, in a setup very similar to the final stage of the prior chapter (he will loose his shield when the bodyguards are down). In addition to STR and PSY bodyguards, he has three DEX ones, too. Double Eneru can handle them - but if you burn too much specials, the next stage, with 2 QCK healing bodyguards and 3 INT ones may be a problem, as they all start at 1-2 CD and then attack on 1 CD, overwhelming Eneru's healing. Hopefully you have something like Halloween Zoro or TS ready to hurt them. Take out the healing ones first, then try to take others as quickly as you can - but leave one to do an infinity stall, i.e. charge your specials again. The final boss is Trafalgar Law Supernova (5,920 ATK, 2 CD, 1,110,000 HP). He will open with a preemptive 99% lowering of your ATK debuff (~20% reduction, I think, but another guide states 50% - need to double check). Note you can cancel that if you enter his stage with a shorter duration debuff from the bodyguard at the previous stage. He attacks for under 5k so is tankable by double Enru, but under 50% he will gloom your friend captain for 99 turns. At that point, Double Eneru starts loosing HP, so some meat orb luck may be needed. When he is close to 20% he will activate his special, which will leave your friend captain with despair for 99 turns.
Other suggested teams:
| Double Ray-Ray Team | |||
|---|---|---|---|
| Captain | Subs | Friend | Ship |
| Requirements | |||
| |||
| Double Garp? Team | |||
|---|---|---|---|
| Captain | Subs | Friend | Ship |
| Requirements | |||
| |||
- Chapter 10
You will face Eustass Kid (3,910 ATK, 1 CD, 1,150,000 HP), who is much less trouble then Law (perhaps because Law's stage effectively has 2 boss stages; this one is just regular grunts until the Kid). His preemptive is nasty: delay protector for 9 turns, empties all of your orbs, and puts up a 25 combo shield for 1 turn - so there is little you can do to burst him before he hits you. He starts with a 1 turn CD, and of his first attack he will use his special for 9050 damage and slot shuffle (which can include bomb orbs); from that point on, he will attack for 3910 each turn. He has no <50% trigger and his <20% trigger is an attack boost (~7000 damage each turn).
Suggested teams: Double Eneru, Slasher, DEX (Double Zoro tank).
- Chapter 11
Very easy and forgettable grunt stage.
- Chapter 12
Ditto.
- Chapter 13
You will face Pacifista PX-4 (10,100 ATK, 3 CD, 2,500,000 HP) You will first encounter a Pacifista on 2-4 turn CD. He will either hit you for 10k or self repair after 4 turns and retreat, depending on the amount of damage you dealt to him. After that you get some grunts and it reemerges on stage 5, still having all the damage you did, minus the self repair. It will put up a 10 turn barrier, blocking everything until hit by 2 perfects and having a 3 turn cd.It will then self repair and retreat again. After another stage of grunts, it reemerges again, with still the same damage and again the same barrier. Additionally it will first strike for 5k. It will self repair every turn for 50k. Under 20% it will hit for 17k. Double Eneru works well here, just burst before it is able to attack at <20%.
- Chapter 14
You will start against another Pacifista, this time a Dex type, on a 5 turns cooldown, selfrepairing from the very start for 50k each turn. It only has around 750k hp and attacks, like all others for 10k. Afterwards you get some grunts and on stage 3 another Pacifista, this time QCK type. It will start by paralyzing your friend-captain for 5 turns. However, it will not selfrepair. It hits for 10100 points of damage, every 3 turns. After that, some grunts again. Stage 5 is another Pacifista, this time PSY type on a 4 turn cooldown. Every two turns it will turn all your slots to weak (won't shuffle TND/RCV). Then another wave of grunts, followed by a INT Pacifista, with a 3 turn cooldown and a 10 turn 2 perfect block shield, making this one a nightmare of log luffys. Then again, grunts, this time 2 waves of them. For the last battle, you will face Sentomaru (6800 ATK, 2 CD, 1,320,000 HP). He puts up a 20 turns 20 hit combo shield and for 99 turns a damage reducer, reducing damage over 100k. Another nightmare for log luffys. Under 50% he up a 99 turn debuff immunity and a 99 turn defens buff. Under 40% his next attack will take half of your remaining life. He will attack you for a high (90? Please confirm) % of your remaining life under 20% and THEN attack you regulary! A strong base attack rainbow team, with some high combo chars are going through here easily. Suggested teams: a slasher team with Zoro and Kuro. Or double Eneru, but you may need to burst twice on the DEX Pacifista, since it regens most of the damage you can dish out. Expect good 10 minutes on that stage with double Eneru, it is safe but not fast.