 | |||||
| Chapter | Stamina | Battles | Quest | Boss | Conditions |
|---|---|---|---|---|---|
Nightmare Immunity Characters will NOT take any damage from the environment. | |||||
Nightmare Immunity Characters will NOT take any damage from the environment. | |||||
Nightmare Immunity Characters will NOT take any damage from the environment. | |||||
Nightmare Immunity Characters will NOT take any damage from the environment. | |||||
Nightmare Immunity Characters will NOT take any damage from the environment. | |||||
Nightmare Immunity Characters will NOT take any damage from the environment. | |||||
Nightmare Immunity Characters will NOT take any damage from the environment. | |||||
Nightmare Immunity Characters will NOT take any damage from the environment. | |||||
Nightmare Immunity Characters will NOT take any damage from the environment. | |||||
Nightmare Immunity Characters will NOT take any damage from the environment. | |||||
Nightmare Immunity Characters will NOT take any damage from the environment.
| |||||


| Other Notable Drops | |
|---|---|
| |
| Chapter | Beli | Experience | EXP/Stamina | Rainbow Gem | Title Gained | Conditions |
|---|---|---|---|---|---|---|
Special Zombie |
Clear Chapter 50 times
|
5x Rainbow Gems |
|
Farming notes[]
Cindry and Ryuma are useful but she drops from a fortnight, so ignore her here. Cerberus is a defence reducer whose starting cooldown is lower than that of Cabin Boy Helmeppo or Manticore, so until/unless you have one of those at a better cooldown, he is worth a shot. Taralan has weak stats but an ok special, and may have niche uses as a Cerebral/Powerhouse time delay unit. The star here is Gecko Moria Thriller Bark Demon who has a number of uses, and is definitely worth getting.
How to beat Mouth Gate ~ Hogback’s Mansion[]
First, note some new units. Regular zombies will activate various specials at <20%: red will hit for ~5k damage, blue gives them a few turn def boost, green chains a unit for 2 turns, yellow heals and pink hits for 8k! A good rule of thumb is - you don't want to leave them at 20%. They attack for about 2k (QCK, PSY) on 1 turn interval to 3.5-3.7 (STR, DEX, INT) on 2 turn interval. Animal zombies are going to change some of your slot to bombs, activating regardless of cooldown or HP but only once per unit; they come in three colors - one changes INT/PSY orbs, other QCK/DEX/STR, and the last, TND/RCV; they attack for about 2k on 1 turn interval. Finally, the knights attack for about 5.5k on a 3 turn interval, have about 120k HP, 1500 DEF and if under 30% they will activate a 3-turn special, even if it is not their turn to go. Green is the least annoying, limits your combochain to 2x, shutting down G3/Ray/similar teams for a few turns. QCK will cast a major DEF buff for 45,000, which many teams have to wait out, and STR an ATK buff for 13,000, which more or less spells death on hit. As an island-wide secret and pretty rare stage, you can also encounter DEX Jigoro of the Wind, who attacks every turn for 2736 and has 415k HP.
- Chapter 1
PSY Cindry hits for 2641 every turn and has 790,000 HP. She will do a 30% HP cut (when?). At HP < 20% she will despair Captain+Friend for 10 turns.
- Chapter 2
QCK Cerberus attacks for 2759 every turn and has 500k HP. You will meet him twice and each time he will pre-emptively do the following: chains random unit for 1 turn, chains random unit for 2 turns, despair captain for 3 turns.
- Chapter 3
Grunts. Nothing special, but the zombies you fight in the boss stage have several times the HP they have usually, about 120-130k.
- Chapter 4
DEX Bear Skin Rug attacks every 2 turns for 4740 and has 610k HP. In the middle of the adventure he will apply a "no meat" debuff for 99 turns. This gives a zero percent chance of RCV slots (Please confirm if it also affects captain RCV abilities). He will also do a 4740 first strike damage, and under ? % he will buff his ATK to 7110.
- Chapter 5
PSY Ryuma attacks every 2 turns for 6505 and has 980k HP. He will first strike you for that much (verify amount?) and cast a debuff protector for 99+. Once you defeat him, he will resurrect himself with 245k HP.
- Chapter 6
DEX Bear Skin Rug is back and applies a "no meat" debuff for 99 turns at the beginning. Starts off as before he attacks every 2 turns for 4740 and has just a bit more hitpoints, 661512 to be exact. This time he does just 3100 first strike damage.
- Chapter 7
QCK Dog Penguin attaks every 2 turns for 4085 damage and has 500k HP. Don't be fooled by the penguins, instead of the usual fodder they mean business - hit for 3895 each every 2 turns and have 375k HP. You will get first striked with RCV=0 for 6 turns, and every 2 turns you get 1 turn of ATK debuff. Inupe the Dog pinguin will not attack if there is a female crewmember on your team. Instead he will give himself an attack debuff, while not even actually attacking.
- Chapter 8
INT Taralan hits for 5529 every 3 turns and has 1,380k HP. He will first strike a random non-captain unit with a 50-turns lock. Under <50% he will chain 2 random units for 2 turns , blinds the crew for 99 turns. Under <20% he will shackle 3 random units for 2 turns and again blind the crew for 99 turns. These shackles can hit both of your captains. Both moves can hit the already shackled unit.Nami Weatheria Cat Burglar can be very usefull for unlocking the 50 turns lock and for punching him in the face.
- Chapter 9
Grunts, but you do have to deal with 3 Knights on the final stage, and they are a bit buffed up, hitting for about 1k more than usual, and with ~450k HP on each of them.
- Chapter 10
STR Kumacy attacks for 8588 every 4 turns and has 1,450k HP. <20% he boosts his ATK to 12,882. He also pre-emptively gives himself a 10 hit shield, which means he will nullify first 10 combo-hits, so totally negate damage from 1-3 of your units. Atttack with high combo weak units first, like GPU.
- Chapter 11
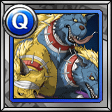
On your way to the boss, be prepared for numerous Knights. Gecko Moria hits for 3781 - but starts with a 90 turn cooldown (and 1,200k HP) and a 10-hit shield (meaning he will absorb the first 10 combo hits). He will however summon zombies every 4 turns or so starting from the 2nd turn, they include a mix of various types, including Knights (about 2 on average). Once you get him to 33% he will haste himself going to 1 turn cooldown so you will want to burst him around that time (note: he does not haste the mobs, and he will keep summoning them ever few turns).
This is a difficult battle, since you have to deal with a 10-hit shield and respawning mobs. The odds are good that if you are taking mobs, you won't do much damage to Moria due to his combo shield. There are two approaches you can take: burst or tank. Burst requires heavy-hitting captains (Sengoku, for example, can clear things very easily in 1 turn). Tanking means probably Garp (see video), or Eneru. Eneru can totally clear this, but it is recommended to have max level and +100 CC (special CD is irrelevant). For team members, the following mostly-F2P team works: GPU, Hallowen-Zoro, QCK Kalifa, ZoanLucci. Kalifa can be replaced by some other unit, since she essentially gives you just 1 more turn. You should be fine with Kaku for more burst, for example. In any case, once you get to Moria, you should remember not to wipe the mobs too quickly, or they'll end up resummoned. Try to wipe them with Thousand Sunny and like immediately after resummining, and delay them otherwise - you need to take down Moria ASAP so he stops the resummons. Rough walkthrough: 1st turn, attack Moria, tank zombies. 2nd turn, TS and keep hitting moria. After the next resummon, GPU, Eneru. Eneru again on next turn. Finish Moria and then the mobs. Zoro is just in case things go haywire and you need to delay the mobs or Moria (keep in mind delayed units cannot be delayed again until they attack at least once).
Another good team to clear this - Legend Blackbeard. With him, you don't have to worry about the barrier at all.
Video Walkthrough[]
")